May in the Garden
May is when the growing season really becomes a reality, and why this blog post is late! In May we can really get out into the garden and get our hands dirty. Make sure to wear sunscreen, a hat, sunglasses and gloves, and also stretch, take breaks and hydrate!
Design
Have a planting plan and a plant shopping list BEFORE you go to a plant nursery or plant sale. Going to a plant sale in spring is like going grocery shopping when you’re hungry, you have to exercise additional restraint, and a list helps curb your plant-buying appetite. Take pictures or notes of plants that tempt you, then go back home and look at your planting plan to see if you actually have space for them before buying them. Keep your planting/garden plan and a notebook handy. Record purchases and new additions to the garden. Use a rainy day to catch up and update your garden plans and garden journal to include new additions. Make sure to record the name, variety, source, and planting information for each plant.
Instead of planting 1 of everything (got to collect them all!) which can look busy and fussy, try planting odd numbers of plants you like. 1 for tall showy specimen plants in a highly visible spot, then 3, 5, or 7 or more for border, mass planting, edging, or ground cover. While our eyes love variety, we also crave rhythm and harmony, patterns, a feeling of unity and rest.
Inventory and reevaluate planting space and garden locations with each trip, and make sure to thoroughly check the growing conditions of the plant and assess your own limits. A lot of people look for the sun needs of the plant, but not the soil structure, pH, fertility or moisture needs. Here in Lansing, we have a lot of clay and more neutral soil, so things that prefer sand and acidic soil require much more work to amend the soil to make happy here. If you pick plants that need a lot of moisture, amend the soil with compost and add mulch around the plants to help them hold soil better, but also be prepared to water more!
Plans change, sometimes the plants we want are not available, or not enough of them, or we have unplanned additions that we couldn’t resist or that we were gifted by others and didn’t want them to perish. It’s all too easy to end up with too many plants or the wrong type of plants for your conditions. If you do end up with too many plants, tuck them into containers or have a nursery bed, or share with a friend, or give through a mutual aid network like your local Buy Nothing group, or just list them as free on facebook marketplace. Spread the plant love!
A word of caution:
Keep an eye out for plants that have words or phrases like “vigourous” “spreading,” “fast-growing,” “self-seeding” “opportunistic” “naturalizes well” or “good groundcover” on the label or on plant descriptions online. These plants can take over the garden, crowd out other desired plants and spread into natural areas and harm our local ecosystems. Some of these are considered “invasive weeds” by other states: non-native to the ecosystem, whose introduction causes or is likely to cause economic or environmental harm or harm to human health. Even if they aren’t classified as “invasive,” aggressive ornamentals should be treated with caution due to the consequences they may have on the environment and the extra strain they cause for people who plant them or come later and have to manage or remove them.
Many nurseries sell aggressive ornamentals that can get out of hand if you aren’t careful, try to research the plant’s growth habit and how it spreads and reproduces before purchasing, but some of these can do quite well in containers or beds contained by good root barriers or surrounded by concrete. Unfortunately, a recent study found that “existing regulatory and ethical guidelines do not serve to limit the widespread introduction of invasive plants and that more than 60% of the 1,285 plants identified as invasive remain for sale.” Do your research and your due diligence before you add something to your landscape.
Notice
With your garden journal and camera, notice the progression of blooms in your garden, your neighborhood, and at gardens, parks, and/or conservation areas you visit. Learn from these what you might like to see in your garden for next spring.
As you walk around your landscape, notice the gaps. These are great spots for annuals this year and for putting in bulbs in the fall. Mark them with utility flags or a stick in the ground. Notice where cool season weeds pop up, thats an opportunity for a cool season plant you want to take that space!
In the Garden
Trees
Weed and mulch around trees, a wide mulch ring that covers most of the area under the tree canopy creates a good environment for tree roots and then they dont have to compete with grass for water and nutrients. Shreddeed bark and woodchips help conserve water, reduce weed growth, and add nutrients to the soil beneath. Maintain no more than a 3″ layer of mulch around trees and keep the mulch away from the tree’s trunk, which can lead to decay. Limit pruning to disease control and repair, leave any major pruning for after the leaves has fully developed to reduce the risk of damaging the bark. Do not prune oaks, it increases the risk of oak wilt, wait until they are dormant.
Shrubs
Prune spring-flowering shrubs as soon as they are done blooming, finish pruning by early June so that the plants have enough time to set flower buds for next spring. Renewal prune suckering shrubs, such as forsynthia, spirea and lilac, by removing 1/3 of older stems to ground level. Remove faded flowers from lilacs and rhododendrons to encourage better flowering next year.
Bulbs
Finalize summer bulb garden plans, tender bulbs like dahlias and cannas are great for filling voids left by early bloomers or winter-killed plants. Or use them in containers to dress up steps, patios or other areas that lack planting space. As spring bulbs fade, don’t cut them back until they naturally decline, they need some time as just foliage to store energy in the bulbs. Think about early summer perennial plants that could hide their untidy appearance, like geraniums, catmint, or daylilies, and would help you avoid digging or disturbing bulbs with yearly planting.
Prepare the soil before planting, add low-nitrogen organic matter to the top 8-12″ of soil. Once the soil warms you can begin planting. Plant gladiolus corms every 2 weeks from mid may through june to extend bloom time throughout the summer, 4″ deep and 9″ apart. Cut canna rhizomes into small sections with at least 1-2 eyes per division, 4-6″ deep and 12-20″ apart. Divide dahlias so each tuberous root has a portion of the stem containing at least one eye, plant 4″ deep with the tuber on its side and eye facing upward. Install stakes now so you don’t spear the buried tuber later! Plant tuberous begonias and caladiums outdoors in late May or early June when the soil is warmer. Plant tuberous begonias hollow side up and caladiums 1″ deep and 12″ apart. In late May plant forced bulbs outdoors (later up north).
Site Preparation
Landscapers and gardeners typically prepare sites with established grasses by first removing the existing vegetation through methods such as:
- Manually: using an edger shovel to cut a 6-inch deep border for your bed and angle the sides to contain soil and mulch, followed by digging up or cutting out the grass and weeds in sod squares where the bed extension or new bed will be. Soil can then be further prepared with a broadfork in heavy, compacted soils and a hoe and rake to surface till. Like mechanical site preparation, this can harm the soil biota and structure and bring up weeds to the surface.
- Chemically: using a non-selective herbicide (like glyphosate), several applications may be needed, the solution can also be diluted. Be sure to read and follow label directions, mix it carefully according to the directions and spray the intended site. Be careful not to step in it as you’re spraying, you will leave dead footprints on your grass elsewhere. Applications are best done on a dry evening with little wind. About 10-14 days after application, you can see what you missed and reapply. You can plant into the dead layer of grass if soil does not need amending, it acts as an additional layer of mulch and will help prevent erosion when establishing beds on slopes. The dead turf and vegetation provide good organic matter and the undisturbed soil will have few weed issues during establishment.
- Mechanically: tilling the area to kill and incorporate the grass. Once the old vegetation is removed, usually the soil is tilled to a depth of 6-14 inches to relieve compaction and create a loose seedbed. Tilling the soil kills the soil biota (spiders, worms, etc) and is harmful to the soil structure. It brings a large volume of weed seeds to the surface which can now germinate and overwhelm a young planting.
- For mechanical and manual site preparation: The area might need to be graded to ensure water flows away from structures and does not pool, and then firmed with a roller to ensure a level surface. Depending on soil test results and intended plants, you might want to amend the soil with organic matter (like compost) to improve structure, fertility and drainage, and apply necessary lime or sulfur to adjust pH.
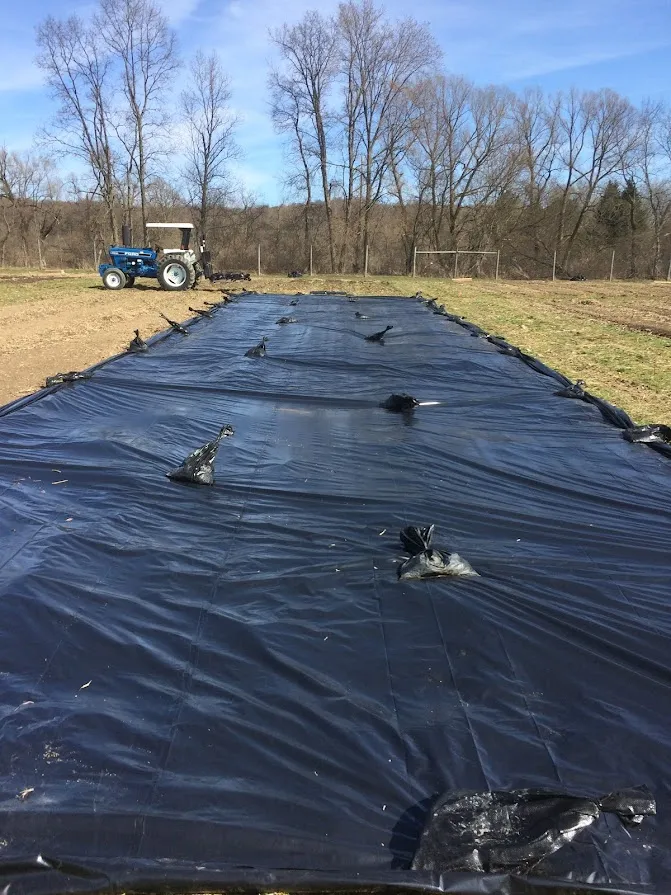
- Occultation/passive weeding :Another method is occultation or passive weeding. Planting beds are covered with tarps or cardboard to kill off existing plants through the absence of light (a.k.a. occultation). This is the most environmentally friendly, particularly if you do not need to bring in outside soil/compost and plant directly into the existing soil and if you can source second hand tarps. Silage tarps work particularly well, as do old billboard tarps. Native plants, especially those native to meadow and prairie ecosystems, in particular thrive in poorer soil. Standard Tarping (Occultation): For most lawns and annual weeds, a dark tarp needs to remain in place for 4 to 6 weeks during warm weather. In cooler months, this duration extends to up to 10 weeks. Aggressive Perennials: Tough grasses like Bermuda, quackgrass, or Johnson grass may require 6 to 16 weeks to fully kill the root systems. Long-Term Control: For complete elimination of aggressive perennial roots or seed banks, tarps may need to stay in place for 3 to 6 months or longer. Cardboard is a slower alternative, typically taking 4 to 12 weeks to kill grass beneath it. However, this may not be effective with bindweed, quackgrass, and canada thistle which can rest dormant in the earth and regrow intensely through the layered material.
- Sheet mulching: Sheet mulching is a method of occultation/passive weeding can be a way to keep your soil structure and soil life (biota) intact and improve the soil without using herbicides or tilling. You mow your the area very low, then cover with a thick mat of cardboard, then a layer of compost, another thick matt of cardboard. This is your main weed barrier. Above that you can create your own soil with lasagna mulching (layers of material that will decompose into soil like straw, leaves, grass clippings etc), or use purchased topsoil and compost. Try to get locally made compost! Or, when transplanting you can dig larger holes and add compost into the holes while transplanting. On top of the compost/topsoil layer a layer of organic mulch is often added like straw or wood mulch. For best result, let your sheet mulching sit for several months before planting. Ideally, sheet mulch in the fall/winter, and plant in the spring. Planting in a newly sheet mulched project can result in reemerging grass/weeds.
Annual Edibles
In early May plant cool season annuals (broccoli, Brussels sprouts, early cabbage, collard, kale, kohlrabi, leek, onion, and spinach), and after your areas date of average last frost you can plant half-hardy annuals (cauliflower, celery, chard, chicory, Chinese cabbage, endive, and lettuce). In mid-may we can plant beans, corn, late cabbage and brussel sprouts here, but I often wait until until the 3rd week of May. In late May we can put our transplants of tomatoes, peppers, okra, eggplant, winter squash, pumpkins, cucumber, muskmelons, celery, and herb sin the garden, and sow seeds of lima beans, cucumbers/melons/winter squash/summer squash/watermelon (cucurbitaceae). I like to start muskmelons, cucumbers, pumpkins and winter squash indoors in early May, but they also are easy to start from direct seeding outdoors. This is the timing I use for my location, in Lansing, MI zone 6a, but you should adjust for your own location.
Make sure to add compost and other amendments to give these plants the fertility needs they require! They are feeding us, and we need to feed them first for them to do that well. Add organic matter and compost to the top 6-12″ or soil, rake it smooth and allow the soil to settle before planting into. Harden off your plants before planting (see below).
Look for ways you can add edibles to your landscape, like strawberries as a ground cover in sunny locations, or Swiss chard for shady areas. Tomatoes, peppers or eggplants with colorful fruits are great additions to flowerbeds and containers, as are nasturtiums with their spicy leaves and flowers.
Hardening off plants
Make sure to harden off your plants (acclimatize them for outside weather conditions):
- Move plants ourside and expose them to lower temperatures gradually.
- Protect them from full sun and wind, which can cause them distress, and gradually expose them to these conditions as well.
- Hardening off is commonly done over a period of 3-5 days, or up to 2 weeks before transplanting. Harden off young plants for a few hours the first day, and add more hours each day until the plant is exposed to the outdoors for 6-8 hours and is handling the conditions well.
- Use cold frames, cloches, or row covers (cotton if you can get them!) to help with the hardening off process.
- Cover or move plants to the garage or basement in case of frost.
Transplanting
After the planting holes are prepared, remove plants from the pre-moistened container. DO NOT pull on top growth before firmly squeezing the pot sides and pushing up through the bottom holes. Once the mass is loose, continue to squeeze sides and gently wiggle the plant to release the root ball intact. Hold the plant so that the top of the soil around the plant is at the same level as the surrounding soil. Firm in place, forming a slight dish to hold water. Watering gently but deeply will settle the soil around the roots and allow new, and deeper root formation. I suggest marking the location of any new plant with a sturdy tag that will stay in place through the establishment phase. This will help to ensure that the plant receives the early care that it might require. It can also ensure that a desirable plant is not mistaken for a weedCover with soil and gently tamp to remove air pockets. Remove any flowers and cut back leggy plants at the time of planting (unless you are trellising them), this helps direct the plants energy toward root development, branching and better looking and healthier plants in the long run over small plants but flowers now.
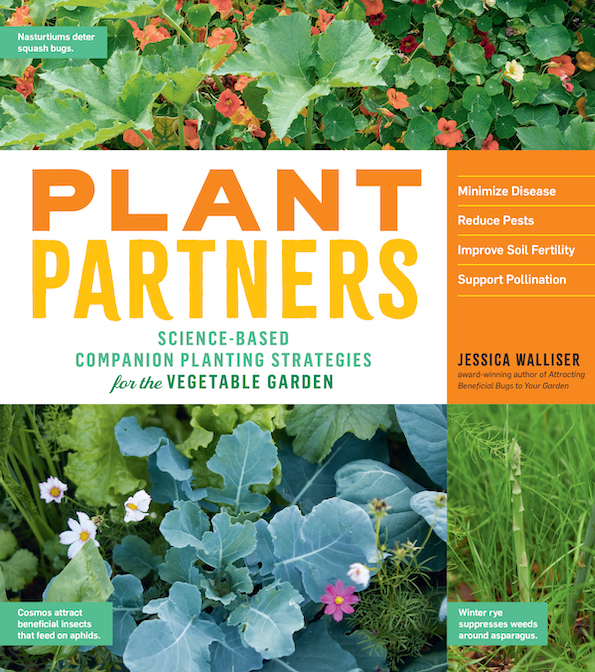
Try to stick to the planting spacing recommended, too crowded can reduce air circulation and increase the risk of disease. You can play with this more as you get to know your plants better, layering low growing plants with upright or trellised plants to use all the layers of the garden and plant more intensively. If you want to know more, start looking into interplanting and companion planting, I would recommend Japanese Style Companion Planting, Carrots Love Tomatoes, Plant Partners for the more academic research inclined, and Plantiful for ornamental gardens. These are great resources for a wealth of information on how you can pack more into your gardens, help plants benefit each other and crowd out weeds.
Perennials
Complete soil preparation for perennials so they can get in the ground. Just because a plant is native, that does not mean it will thrive with no water or fertility added, but go for a higher carbon to nitrogen ratio compost, like leaf compost, and you can start making your own leaf compost pretty easily. Most urban soils have very poor soil due to construction and years of misuse and compaction, often having subsoil brought up to the topsoil layer, this is not ideal for any plant, native or not. Almost every soil benefits from the addition of compost, well-rotten manure or leaf compost, but native plants that prefer “less fertile soils” should be given leaf compost which is lower in nitrogen instead of the higher nitrogen compost alternatives.
These organic matter additions help improve drainage in clay soils and water-holding capacity in sandy soils. Incorporate a 2-4″ layer into the top 6-12″ inches of the garden soil. Work the soil when it is moist, but not wet. Grab a handful of soil and squeeze it into a ball, tap the ball with a finger, if it breaks into smaller pieces, it is ready to work. If not, wait for it to dry more, otherwise you will create clods, cracking and lots of frustration for yourself.
Water the garden long enough for the top 2-3″ to moisten, then wait a few days for the soil to settle. Dig holes 2-3x the root ball, amend the planting holes with compost or other organic matter. Like with annuals, plant the perennial to the soil surface level it was in in the pot. Plant, mulch, water, repeat!
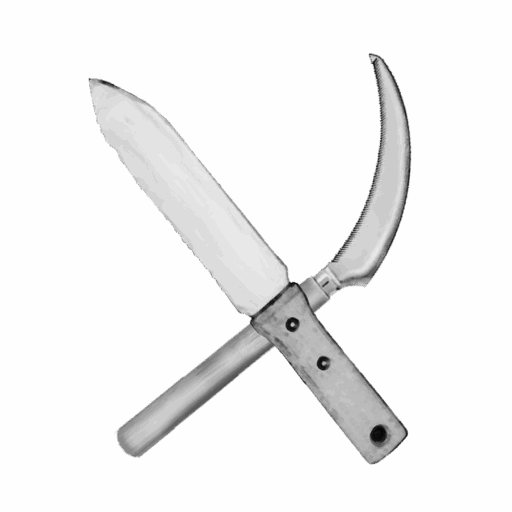
Early and Mid may is still a good time to divide summer and fall flowering perennials as well, and is particularly needed if plants are developing a dead spot in the middle. Dividing helps prevent overcrowding and helps plants maintain their vigor. Dig up the plant, cut the root ball and plant into half (or more) with a sharp shovel, hori hori or folding saw, then transplant into prepared holes as with transplanting. Double check with an internet search that your plant might need dividing first, some plants like those that have taproots do not divide well.
Dig up and divide overcrowded, declining or poorly flowering ground covers. Lift the plants with a shovel, remove and compost dead centers and declining plants, cut the remaining clump into several small er pieces, add organic matter and a low-nitrogen organic matter or fertilizer to the top 6-12″, plant the divisions at their recommended spacing.
Wait for the soil to warm up before adding mulch, and do not bury the crowns of the plant, this can lead to rot. Deadhead early blooming perennials, like phlox, candytuft, and dianthus, to encourage a new flush of foliage with hand pruners or pruning shears. Pinch back shasta daisy, bee balm, garden phlox and obedient plant to control height and stagger bloom times. You can thin bee balm and phlox as well to help prevent powdery mildew, remove 1/3-1/3 of the stems. Disbud peonies (remove side flower buds) if you want fewer but larger flowers. Most perennials don’t need much fertilizer, but you can top-dress established plantings by spreading an inch or two of compost every other year or so to provide for the nutrients.
Mulch
If you are going to use a landscape fabric, I would recommend using a plant-based landscape fabric that you can purchase at Menards, and then mulch added. Personally I would not recommend using landscape fabric, it ultimately degrades soil health while failing to provide long term weed growth. While it does suppress initial weed growth, it also creates a barrier that prevents air, water, and nutrients from reaching the soil, leading to compacted, unhealthy earth that requires excessive fertilization. Most landscape fabrics are made of non-biodegrable plastics that fragment into microplastics, contaminating the soil and entering local water systems, and are difficult to remove.
Instead, use layers of cardboard or newspaper around the installed plants and over the beds, then a layer of organic mulch such as straw, chipped wood or shredded bark, or planting densely a ground cover layer to your garden to outcompete weeds naturally. Leave a small, mulch-free area where stems and leaves emerge from the ground. Weeds will still occur, but the mulch will make it easier to pull them out. When you pull them out, add more mulch there. Mulch will also maintain moisture and buffer rapid temperature changes in the soil. There is not a plant on earth that has evolved living in a pile of wood chips, they aren’t equipped to grow outward surrounded by yearly applications of wood, and it can lead to crown rot because the wood chips retain moisture from an irrigation system set to cycle on 4-5x a week, whether needed or not.
If your goal is for the plants to fill in by re-seeding and vegetative spreading, you may not need to re-apply mulch on an annual basis. If densely planted, you can apply some light mulch around plants in gaps, or none at all and do light maintenance weeding once every 2 weeks with a Dutch hoe until the plants spread to cover the area, as well that space can be used to grow annuals, biennials, or short lived perennials. Alternatively, if you don’t want to disturb the soil and bring more weed seeds to the surface, you can use garden sheers and pruning scissors to cut back weeds as they grow and before they set seed and have a change to spread further.
Irrigation
Irrigation is most important for the first year after planting, especially during periods of drought. Purchase a simple rain gauge and time how long it takes for your sprinkler or other form of irrigation to irrigate 1”, it’s also helpful for keeping track of how much rain you recieved. Watering is best done in the cool of evenings, that gives the plants all night to absorb the water without the pressure of evapotranspiration from the sun trying to take it from them. If not, they are best done earlier in the morning. Water plants well before they go in the ground and after they go in the ground. The first watering must saturate the soil mix around the plant’s roots and the surrounding earth, you should put at least 1” of water down, if your soil was dry, 2” or slightly more.
Initial watering when planting is very important. Water deeply to allow the formation of deep drought- and frost-resistant roots. Make sure the plants do not go through significant drought for the first three to six weeks. Plants will be most vulnerable during their first growing season when they are working on growing and expanding hardy root systems. Once established, most native plants should be able to withstand extreme weather conditions.
The rule is water deeply and less frequently. After the first thorough watering, you can wait 4-7 days before you water again, always deeply. Use your sense of touch and sight to check the soil and how dry it feels, look at the foliage of your plants, and know that wilting can also happen from too much water due to roots declining. Or get a soil meter to check your soil moisture levels. Each time you water, water equal to 1” of rain. The soil around the house may be more subsoil/construction soil, and so may hold on to moisture for a longer period. If so, adjust your watering schedule to every 8-11 days.
Always check the rain conditions, how much rain did you get this week, are you going to get soon? Are there drying winds from your site conditions, are hot conditions drying plants out faster? Don’t let misty mornings fool you, you still may need to water. Observe your plants, how do they look? They should be a healthy green. In about 5-7 weeks after planting you should start seeing new foliage develop, at this point you can begin to reduce the watering. Always check the weather conditions, if there’s plenty of rain, you may need to water only every 2-3 weeks, particularly in fall, the cooler weather should keep the soil evenly moist. Consider adding rain barrels, soaker hoses or drip irrigation to help conserve water and make your planting more low maintenance.
Problem-solve
As the garden kicks into a higher gear, so do our problems in it! Monitor for animal damage–deer, rabbits, squirrels, groundhogs–particularly like to eat or dig up our young plants. Repellents applied before they start feeding and gotten a taste for it helps, and tall fencing to keep our deer and rabbit, or natural repellents such as Plantskyd have worked well for me. To make fences more visually appealing to humans, you can use black or green posts and mesh fence. Here we have lots of squirrels and groundhogs and free cats. I find spreading powdered garlic and crushed red pepper on my pots and beds after every watering/rain keeps them out of my plants.
Pull or cut back weeds as they appear, apply more mulch or add a plant to the gaps they were in. Address them when they are small so they don’t overwhelm you later.
Keep an eye out for aphid, mite, spittlebug, slug, 4 lined plantbug, leaf miners, tent caterpillars, asparagus beetle, flea beetle, spotted cucumber beetle, and earwig damage. Monitor for bulb rot and remove infected plants, take note where you then need to improve drainage at the end of spring or in fall. Problem solve as the problem arises!
Enjoy Your Garden
Gardening is being intimately intertwined with our bodies and our world, noticing and making design decisions that please our palates, our senses and our ethics. Take time to sit back and appreciate your plants and space, and just be in your garden or other spaces filled with flora. Reading the above may feel overwhelming, there’s so much to do and know and experiment with! But we have all our lives to learn and try new things and get better at noticing and reading the landscape and plants.
Gardening is a particularly challenging but also significantly enriching hobby. It’s great physical movement and exercise, it helps improve our diets, our mental health, reduce stress, strengthen social connections, and even improve our gut microbiome! Start small, start where you are at, find other gardeners and learn from each other, and keep on learning and trying things.